

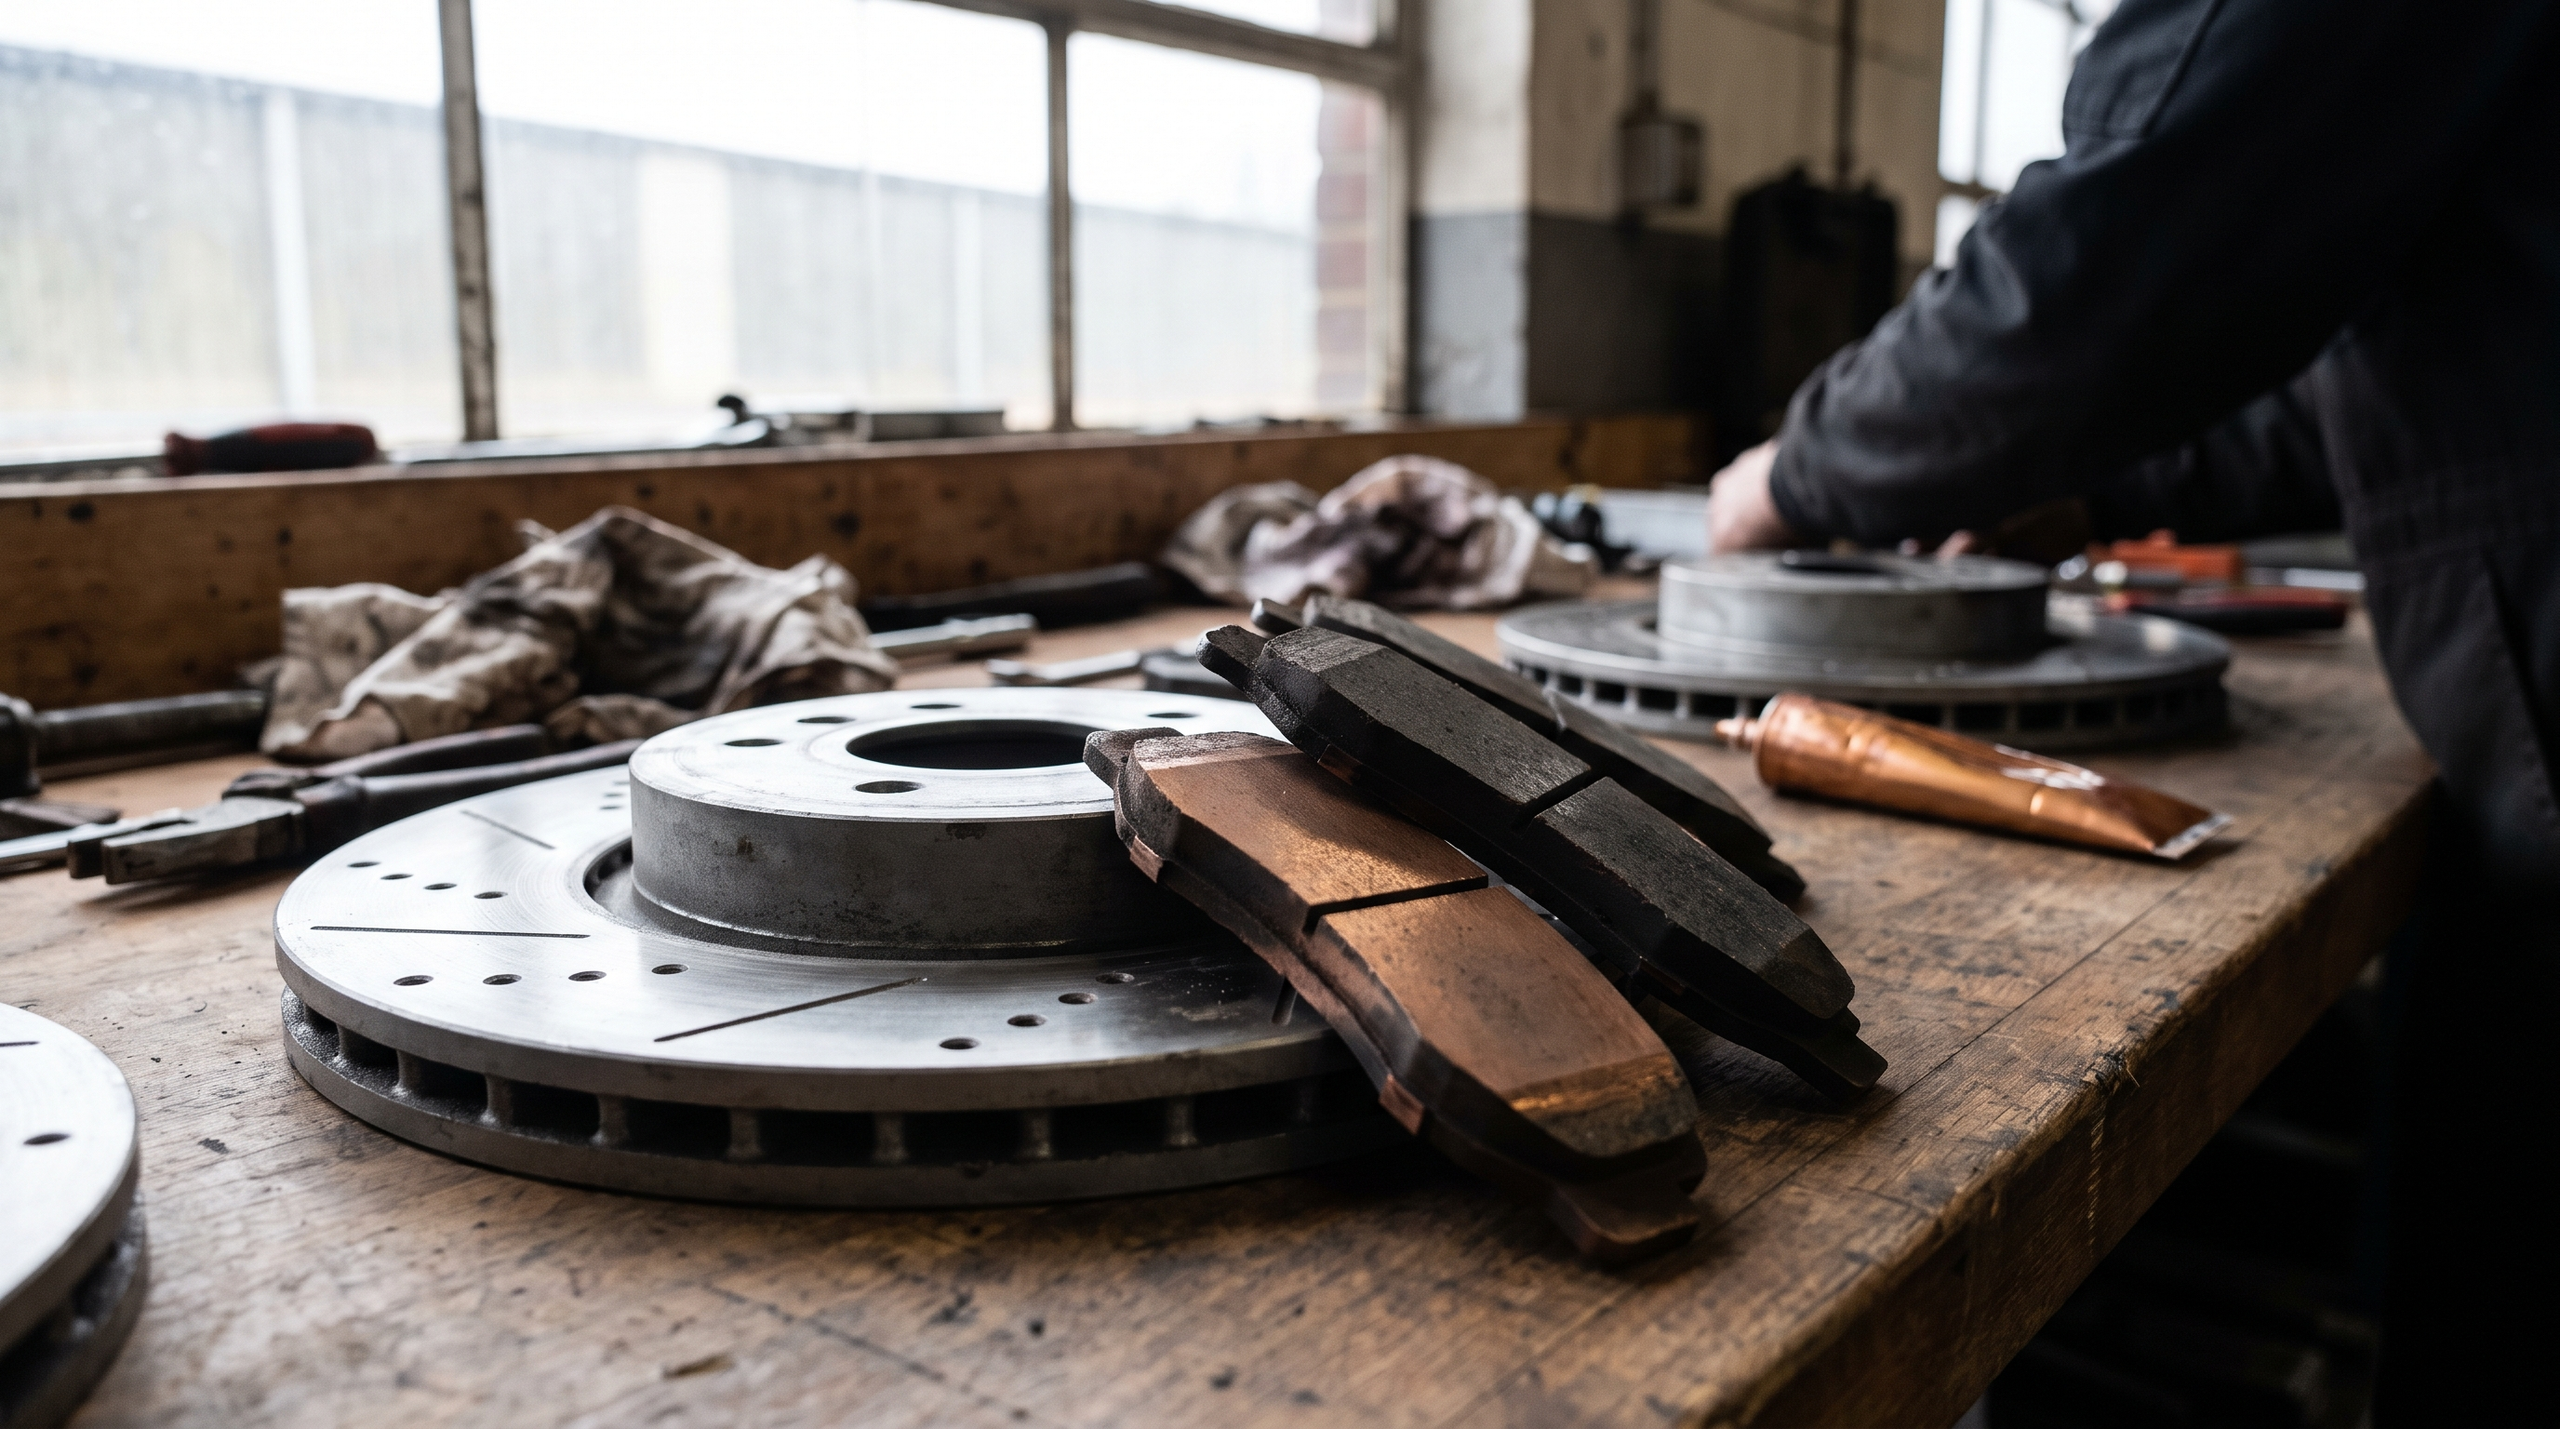
European Car Brake Upgrades: Pads, Rotors and Street vs Track
Explore European Car Brake Upgrades, including pads, rotors, and the key differences between street and track options for your vehicle.
Introduction to European Car Brake Upgrades
I have watched the same mistake at the counter for years: someone orders high-performance pads for a BMW or an Audi, bolts them on, and then complains about noise and dust on the drive to work. The pads are not defective — they are just the wrong spec for the use. European car brake upgrades hinge on one decision: are you stopping from 70 on the freeway, or are you threshold-braking into Turn 11 at Laguna Seca? The components that work in one scenario create problems in the other, and mixing them is worse than running stock.
The factory brake system on a Mercedes C-Class or a Volkswagen GTI is engineered to the car's curb weight, power output, and the duty cycle the manufacturer expects. Upgrading means replacing the friction material — pads — and the heat sink — rotors — as a matched set. You cannot bolt track pads onto worn rotors and expect even contact, and you cannot run slotted rotors with a street pad compound without accelerating wear on both. The rotor's metallurgy, slot pattern, and thermal mass have to align with the pad's operating temperature range and the heat you actually generate. If they do not, the system either underperforms or destroys itself.
Pad compounds fall into rough categories: organic (low dust, quiet, moderate heat), semi-metallic (higher heat tolerance, more dust and noise), and ceramic (clean, quiet, expensive, limited temperature ceiling). Track pads — often labeled "race" or "competition" — are formulated to bite hard at temperatures above 400°F, which means they glaze and judder when used cold on the street. Street pads work in the opposite range: they grab well at 150–300°F but fade and outgas when pushed past that. The rotor has to dissipate the heat the pad generates, so a two-piece floating rotor with directional vanes moves more air than a solid disc, but only if the pad compound produces enough heat to justify the cost.
DOT 4 vs. DOT 5.1 brake fluid becomes the limiting factor when you upgrade to higher-temperature pads. DOT 4 has a dry boiling point around 450°F; DOT 5.1 raises that to 500°F. If your pads are generating heat above the fluid's boiling point, the fluid vaporizes, the pedal goes soft, and you have no brakes. The fluid spec has to match the thermal load, and that load is a function of pad compound, rotor mass, caliper piston area, and how hard you use them. A track day on stock fluid is a single-use experiment.
The introduction of stricter emissions and particulate standards is pushing the aftermarket toward cleaner friction materials and low-dust formulations, aligning replacement-market performance more closely with OE expectations. As brake systems integrate with vehicle software and stability control, the mechanical upgrade has to work with the ABS module and the wheel-speed sensors, not against them. The days of bolting on any pad that fits the caliper are over — the system expects a specific friction curve, and deviating from it triggers fault codes or degrades intervention quality.
Explore European car brake upgrades, including pads, rotors, and the key differences between street and track options.
What Are European Car Brake Upgrades?
I've watched too many customers walk in asking for "the best pads" without saying whether the car sees a track or just the commute. The answer changes completely based on that one detail. A brake upgrade is not a single thing — it is a matched system of friction material, rotor metallurgy, and fluid specification chosen for a defined thermal load.
Pads: Friction Material and Operating Temperature
Brake pads are categorized by their friction compound. Street pads use a semi-metallic or low-metallic formula that bites cold, produces minimal dust, and operates quietly between 100°F and 500°F. Track pads use a high-metallic or carbon-ceramic compound that needs heat to work — they may feel wooden below 400°F but hold consistent friction past 1200°F without fade.
The compound determines dust, noise, rotor wear, and whether the pedal goes soft after three hard stops. You cannot judge a pad by its price or its brand. You judge it by the temperature range printed on the data sheet and whether that range matches your driving.
Rotors: Vented, Slotted, Drilled, and Two-Piece
Rotors manage heat. A vented rotor has internal cooling vanes; a slotted rotor adds surface channels to sweep gas and dust; a drilled rotor adds through-holes for the same reason. Two-piece rotors separate the friction ring from the hat, allowing thermal expansion without warping the mounting face.
Slots help street pads release gas under moderate braking. Drilled rotors look aggressive but crack under sustained track use — the holes are stress risers. Two-piece rotors cost more and weigh less; they are worth it on a car that sees timed laps, not worth it on a daily driver.
Factory rotors on a Mercedes, BMW, or Audi are vented and sized for the car's weight and brake bias. Upgrading the rotor without upgrading the pad wastes money. Upgrading the pad without checking rotor thickness wastes the pad.
Calipers and Fluid: The Rest of the System
Most street upgrades do not touch the caliper. The factory caliper is sized for the master cylinder bore and the ABS module; swapping it means recalibrating pedal feel and possibly losing ABS function. Big-brake kits replace the caliper, rotor, and sometimes the master cylinder — they are for cars running slicks, not all-seasons.
Fluid is part of the upgrade. DOT 4 vs. DOT 5.1: Choosing Brake Fluid for a European Car explains the boiling-point difference; track pads generate enough heat to boil DOT 3 in two laps. If you upgrade the pads, upgrade the fluid at the same time.
Street vs. Track: Not a Spectrum, a Binary
Street pads and track pads do not overlap. A street pad that works cold will fade hot. A track pad that works hot will squeal, dust, and wear the rotor when cold. Compromise pads — marketed as "street/track" — compromise both: they fade sooner than a real track pad and dust worse than a real street pad.
If the car sees the track twice a year, run the street pad and accept the fade. If the car sees the track twice a month, run the track pad and accept the noise. Trying to split the difference costs more in rotor replacement than running two sets of pads.
The question is not which pad is better — it is which temperature range the car will see, and the pad either covers that range or it does not.
Why Upgrading Brakes Matters
I've watched customers walk in wanting bigger calipers and walk out with a parts list they didn't expect. The conversation always starts the same way: what do you need the brakes to do? Most European cars leave the factory with brakes sized for the weight and the performance envelope the engineers drew. An E90 328i stops fine with its OE setup. Put that same car on a track day with sticky tires and the fade shows up in three laps. Upgrading isn't about looking aggressive — it's about matching the friction system to the heat you're putting into it.
Safety and Stopping Distance
The factory brake package on a 2015 Audi A4 is sized for the curb weight and the tire contact patch. Upgrade to a stickier summer tire and the ABS triggers earlier because the deceleration rate exceeds what the stock pads can sustain without fade. A performance pad compound with a higher coefficient of friction at operating temperature shortens stopping distance — but only if the rotor can dissipate the heat. Slotted or drilled rotors move gas and dust out of the pad contact zone; they don't add capacity by themselves. The real gain comes from pairing a pad that grips harder with a rotor that stays flat under thermal cycling.
European ABS and stability systems are calibrated to specific deceleration curves. A pad that bites too hard at low temperature can confuse the wheel-speed sensors and trigger intervention you don't want. The approved pad friction code is usually printed in the owner's manual or the service data. Run outside that range and the pedal feel changes — sometimes for the worse.
Performance and Heat Management
Heat is the enemy. A stock BMW M3 rotor reaches 600°F in hard street driving. Add a track session and that number climbs past 1,000°F. Grey cast iron expands, the pad compound off-gasses, and the pedal goes soft. Upgrading to a two-piece rotor with an aluminum hat reduces unsprung weight and keeps the hub cooler, but the friction surface still needs to handle the thermal load. Carbon-ceramic rotors resist fade at temperatures where cast iron would warp, and they cut particulate emissions by 81% for PM10 and 74% for PM2.5 on average — a fact that matters under Euro 7 standards.
Track pads are designed to work above 400°F. Below that temperature, they squeal and they don't grip. Street pads work from cold but fade when the rotor heats up past their design limit. The mistake is running track pads on the street or leaving street pads on for a track day. Neither setup forgives the mismatch — you either noise-test your neighbors at 6 a.m. or you cook the pads halfway through the session.
Driving Experience and Pedal Feel
Pedal feel is the feedback loop. A good brake upgrade gives you a firm pedal with linear response — press harder, stop harder, no surprises. Cheap pads with inconsistent friction curves create a pedal that feels grabby at the top of the stroke and mushy at the bottom. European cars with hydraulic brake boosters (most BMWs, some Audis) are sensitive to pad compressibility. A soft pad compound compresses under pressure and the pedal travels farther before the bite comes. The driver compensates by pressing harder, and the system works less predictably.
Rotor finish matters too. A rough-turned rotor surface seats pads faster but wears them unevenly. A fine-turned or ground finish gives smoother modulation and longer pad life. If you're upgrading rotors, specify the finish — don't assume the supplier knows what you're driving or how you're driving it. For more on hydraulic system requirements, see DOT 4 vs. DOT 5.1: Choosing Brake Fluid for a European Car.
As tech advances, safety advances. Brake systems are integrating with software and creating safer, cleaner environments.
The integration of brake hardware with electronic control systems means an upgrade isn't just bolting on parts. The ABS module, the pad compound, the rotor metallurgy and the brake fluid all have to work as a system. Miss one piece and the pedal feel tells you immediately.
How to Choose the Right Brake Upgrades
The right brake upgrade starts with where you drive. A street car that sees weekend canyon runs needs different pads than a car running timed sessions at Laguna Seca. I've watched customers install track-focused pads on a daily driver and then come back a week later because the cold bite is gone and the noise is unbearable. The reverse—running soft street pads at the track—ends with boiled fluid and a long tow.
Match the Pad to the Temperature Range
Brake pads work in a temperature window. Street pads bite cold but fade above 400°F. Track pads need heat to activate; below 300°F they feel wooden and dust heavily. If you drive to the track, you need two sets or a compromise pad that does neither job perfectly. Porsche, BMW and Mercedes all publish minimum operating temperatures in their performance parts catalogs; read them before you buy.
Rotor Choice: Slotted, Drilled or Both
Slots wipe the pad surface and vent gas under heavy use. Drilled rotors look aggressive but crack under sustained track heat unless they're two-piece floating assemblies. For street use, a quality slotted rotor from Zimmermann or ATE outperforms a drilled rotor and costs less. Track cars benefit from two-piece rotors with replaceable friction rings, but the price jumps—$800 per axle is common.
Step 1
Identify your use case
Decide whether the car sees track days, autocross, spirited street driving, or daily commuting. If you track the car more than twice a year, plan for track-specific pads and fluid. If it's a street car with occasional mountain drives, stick with performance street pads and OE-style slotted rotors.
Step 2
Check rotor compatibility by part number
European makes often change rotor dimensions mid-year or by build date. A 2015 Golf R and a 2016 model may take different rotors even though the brochure says they're identical. Pull the VIN, call the parts counter, and verify the rotor diameter, thickness and mounting pattern before ordering. Don't assume the listing is right.
Step 3
Select pads based on operating temperature
For street: choose pads with a minimum operating temp below 150°F and a maximum above 600°F. For track: minimum 200–250°F, maximum 1200°F or higher. Read the data sheet; if it doesn't list temperatures, it's a street pad. Brands like Pagid, Hawk and Ferodo publish full friction curves.
Step 4
Budget for fluid and lines
Upgraded pads generate more heat. If you're installing track pads, flush to DOT 5.1 fluid with a dry boiling point above 500°F. Stainless lines aren't required for street use but eliminate sponginess under hard braking. For more on fluid choice, see DOT 4 vs. DOT 5.1: Choosing Brake Fluid for a European Car.
Platform-Specific Considerations
BMW uses floating calipers on non-M models; pad taper and shim placement matter. Mercedes SL and AMG models often spec two-piece rotors from the factory—aftermarket one-piece replacements save money but add unsprung weight. Audi and VW share many brake components across platforms, but the Golf R and S3 use different calipers than the GTI despite similar engine output. Verify by VIN, not by model name.
| Use Case | Pad Type | Rotor Type | Fluid Spec |
|---|---|---|---|
| Daily street | Low-dust street | OE or slotted | DOT 4 |
| Spirited street | Performance street | Slotted | DOT 4 |
| Track (occasional) | Dual-duty pad | Slotted or two-piece | DOT 5.1 |
| Track (frequent) | Dedicated track | Two-piece floating | DOT 5.1 |
Price and Quality
Brake disc and pad kits range from $40 to $1,600 depending on brand and specification. The $40 kit is not a bargain—it's a liability. I've seen no-name pads glaze in 5,000 miles and rotors warp after one hard stop. Stick with Zimmermann, ATE, Pagid, Textar or Brembo for street use. For track, Pagid RS-series, Hawk DTC and Ferodo DS-series are proven. The middle of the price range is where the value sits.
Best Practices for Installing and Maintaining Brake Upgrades
I've watched techs ruin a good pad set by skipping the prep work. The rotor surface has to be clean — not shop-rag clean, actual brake cleaner and a Scotch-Brite pad — or the transfer layer never forms right and you get noise from day one. Same with the caliper slides: if they bind, the pad wears crooked and the upgrade you paid for becomes a parts-return argument.
Bedding Procedure Is Not Optional
The first heat cycle sets everything. Street pads need 8 to 10 moderate stops from 60 mph with cool-down time between each one. Track pads want harder initial hits — 80 mph down to 30, repeated until you smell them. Skip bedding and the pad surface glazes; braking feels wooden and fade shows up early. The procedure is on the pad manufacturer's sheet. Follow it exactly.
Step 1
Clean rotor and hub face
Wipe the rotor friction surface with brake cleaner and a clean shop towel, then scuff it lightly with a Scotch-Brite pad in a crosshatch pattern. Clean the hub face where the rotor mounts — any rust or debris here causes runout and pedal pulsation.
Step 2
Lubricate slide pins and pad contact points
Pull the caliper slide pins, clean off old grease, and apply fresh high-temp silicone brake grease. Put a thin layer on the pad backing plates where they contact the caliper bracket — never on the friction surface.
Step 3
Torque hardware to spec
Caliper bracket bolts, slide pins, and wheel lug bolts all have torque specs in the service manual. Use a calibrated wrench. Over-torque a caliper bracket on an aluminum knuckle and the threads pull; under-torque a wheel bolt and the rotor floats.
Brake Fluid Change With Every Pad Swap
Upgraded pads generate more heat, and old fluid boils sooner. I change the fluid every time I install performance pads — DOT 4 or DOT 5.1 depending on what the car specifies. Bleed from the farthest caliper to the closest, and don't reuse fluid that came out of the bleeder. If the pedal feels soft after bleeding, there's air in the ABS module; run the scan-tool bleed cycle.
Maintenance Intervals for Upgraded Components
Track pads wear faster than OE, and slotted rotors show thickness loss sooner than blanks. Measure rotor thickness with a micrometer every oil change; most European rotors have a minimum thickness stamped on the hat. Replace pads when any one is down to 3 mm — waiting until the squealer screams means the backing plate has already scored the rotor.
Inspect the caliper slide pins every 12 months. If the rubber boot is torn, water gets in and the pin corrodes in place. A stuck slide pin loads one pad and leaves the other barely touching; you lose half your braking and don't know it until the pedal goes soft.
Post-Install Check
After the first test drive, pull a wheel and verify pad contact. Both pads should show even witness marks across the friction surface. If one corner is shiny and the rest is dull, the caliper isn't floating or the rotor has excessive runout. Fix it before you bed the pads — bedding locks in whatever contact pattern you started with.
The upgrade works only if the caliper can move freely and the rotor sits flat; anything else is just expensive noise.
Check brake fluid level after bedding. The pads have seated and the pistons have retracted slightly; the reservoir may need a top-off. Don't overfill — when the pads wear and the pistons extend, the level rises and can push fluid past the cap seal.
Common Mistakes in Brake Upgrades
I have watched the same mistakes happen at the counter every week. Someone buys track pads for a daily driver, or they mix rotor and pad brands without checking the pairing, and then they call back because the brakes squeal or fade faster than the factory setup. The wrong combination does not just sound bad — it changes how the system performs and wears.
Mixing Pads and Rotors Without Checking Compatibility
European brake systems are engineered as matched pairs. The rotor metallurgy and the pad compound are tested together, and the friction curve depends on that pairing. When you bolt a random track pad onto a street rotor, the rotor may glaze or the pad may not reach its operating temperature. The result is inconsistent bite and accelerated wear on both parts.
Always check the pad manufacturer's rotor compatibility chart. If the chart does not list your rotor, call the manufacturer before you order. Do not assume that two premium parts will work together just because they are both premium.
Installing Track Pads on a Street Car
Track pads need heat to function. Their friction curve starts high — around 400°F — and they deliver maximum bite above 600°F. On the street, most braking happens below 300°F, which means a track pad never reaches its range. The pedal feels wooden, stopping distances increase, and the rotor surface wears unevenly because the pad is not biting cleanly.
If you drive to the track once a month and use the car daily, run street pads and swap them at the track. Keeping track pads on the car between events is the mistake — you sacrifice everyday performance for a setup that only works under sustained load.
Ignoring Brake Fluid Specification
Upgraded pads and rotors generate more heat, and that heat transfers into the fluid. If you are still running DOT 4 with a 230°C dry boiling point and you install aggressive pads, the fluid will boil under hard braking. The pedal goes soft, and the system loses pressure. The pads and rotors are doing their job, but the fluid is the weak link.
Upgrade to DOT 5.1 at a minimum when you upgrade the friction components. For track use, check the manufacturer's fluid recommendation — some setups require a 300°C+ dry boiling point to handle sustained heat cycles. DOT 4 vs. DOT 5.1: Choosing Brake Fluid for a European Car covers the differences in detail.
Skipping the Bed-In Procedure
New pads and rotors need a bed-in cycle to transfer an even layer of friction material onto the rotor surface. Skip this step and the pad will deposit material unevenly, which causes vibration and reduces bite. The procedure is simple: a series of moderate stops from highway speed without coming to a full halt, followed by a cool-down period with no braking.
The pad manufacturer publishes the exact bed-in procedure — number of stops, speed range, and cool-down time. Follow it exactly. Do not brake hard immediately after installation, and do not sit at a stoplight with your foot on the pedal during the bed-in cycle. Heat-soaking the pads while stationary leaves pad material imprinted on the rotor, which creates a pulsing pedal that does not go away.
Using Mismatched Hardware and Fasteners
European brake calipers use specific fastener torques and anti-rattle clips. Reusing old hardware or guessing at torque values introduces play in the system. Loose caliper bolts allow the caliper to shift under braking, which accelerates pad wear and can damage the rotor surface. Missing or worn anti-rattle clips let the pads vibrate, which causes noise and uneven contact with the rotor.
Replace the hardware kit with every pad change. The kit includes new clips, shims, and fasteners, and it costs less than the labor to diagnose a squeal or vibration that comes from reused parts. Torque the caliper bolts and carrier bolts to the factory specification — do not tighten them by feel.
Frequently Asked Questions About Brake Upgrades
Can I mix street and track pads on the same car?
No. The front and rear compounds need to work together; mixing changes the brake bias and you lose predictability. If you run track pads up front and street pads in back, the rear locks early under hard stops. If you flip it, the front does all the work and overheats. Pick one compound strategy for all four corners, or run separate wheel sets with matched pads for each use.
Do I need to upgrade calipers to see a difference?
Not usually. Most European cars from the factory ship with good calipers — multi-piston Brembos on the performance trims, solid single-piston sliding units on the rest. Pads and rotors are where the contact happens; swap those first. Caliper upgrades make sense when you need more piston area to match a bigger rotor, or when the OE caliper can't clear the wheel you want to run. Otherwise the money goes further into pad compound and rotor metallurgy.
How do I know if an upgraded rotor fits my car?
The rotor has to match the hub diameter, bolt pattern, offset and hat thickness. The outside diameter can't foul the caliper bracket or the wheel spokes. Check the manufacturer's fitment guide by year, model and brake package code — the same model can have three different rotor specs depending on the factory wheel size. Measure twice, because returning a rotor that's been test-fitted usually means you own it.
Will track pads work for daily driving?
They work, but they don't work well. Track pads need heat to bite; cold, they're wooden and the dust eats wheels. You'll have longer stopping distances in traffic and more pedal travel until the rotors warm up. I've watched people run track pads on the street because they liked the idea; they all switched back after the first winter. Save the aggressive compound for the track and run a street pad that works at 100°F.
Do slotted or drilled rotors improve stopping power?
Not by themselves. Slots help vent gas and keep the pad surface clean under heavy use; drilled rotors look the part but they crack easier under thermal cycling. Neither one shortens your stopping distance unless the OE rotor was already glazed or the pad was outgassing. The rotor's job is to absorb and dissipate heat; what matters is the total mass, the vane design and whether the metallurgy can handle the temperature you're putting into it. Cosmetic features don't replace thermal capacity.
What's the break-in procedure for new pads and rotors?
You need to transfer an even layer of pad material onto the rotor face without overheating either one. Do 8 to 10 moderate stops from 40 mph down to 10 mph, with 30 seconds of rolling between each one to let heat dissipate. Don't come to a complete stop with the brakes hot or you'll imprint the pad pattern onto the rotor. After the initial cycle, drive normally for 200 miles before you do any hard stops. Skip the break-in and you get uneven pad deposit, vibration and reduced bite.
Are OEM brake parts better than aftermarket upgrades?
OEM parts meet the spec the car was designed around; they work. Aftermarket upgrades — when they're actual upgrades and not just cheaper copies — give you options the factory didn't offer: higher-temp pads, two-piece rotors, different friction curves. The question is whether you need the option. If you're staying on the street and the factory spec is fine, OEM is the straightforward call. If you're adding track days or towing, or if you want less dust and less noise, a quality aftermarket pad can be better for your use. The brand name on the box matters less than whether the part does what you need it to do.
Do I need to upgrade brake fluid when I upgrade pads and rotors?
You need fresh fluid, whether you call it an upgrade or not. Old fluid absorbs water, the boiling point drops and you get vapor lock under the higher temps that come with more aggressive pads. If you're going to the track, step up to DOT 5.1; it has a higher dry and wet boiling point than DOT 4 and it's compatible with the same system. Flush the system, bleed it properly and check it every season. The fluid is cheap; boiling your brakes into the runoff isn't.
For detailed guidance on choosing the right brake fluid for European platforms, see DOT 4 vs. DOT 5.1: Choosing Brake Fluid for a European Car.
Will upgraded brakes reduce particulate emissions?
The Euro 7 standard, effective for new vehicle models from November 2026, sets brake wear limits: seven milligrams per kilometer for conventional powertrains and three milligrams per kilometer for battery-electric vehicles. Aftermarket pad and rotor combinations are not tested or certified to these limits. The regulation applies to manufacturers at homologation, not to replacement parts. Upgraded brakes may produce more or less dust depending on compound and rotor finish, but there's no requirement or label that tells you the emissions number. If dust matters to you, look for low-dust street pads; if regulatory compliance matters, that's on the OE at the factory, not the parts you install later.
Conclusion on European Car Brake Upgrades
I've watched customers walk out with pads they thought were an upgrade, only to come back a month later asking why the car stops worse. The answer is always the same: they picked parts that didn't match how they actually drive the car. European car brake upgrades work when the friction material, rotor metallurgy and fluid spec line up with the duty cycle — street or track, not a compromise between them.
The path forward is simple. Start with the OE brake fluid specification — DOT 4 or DOT 5.1 depending on what the manual says — and flush the system before you install new pads. Match the pad compound to your use: organic or semi-metallic for the street, full race compound only if you're doing timed laps with tire warmers. Buy rotors that meet the OE dimensional spec, not the lightest ones in the catalog. Measure runout after installation, torque the caliper bracket bolts to spec, and bed the pads on an empty road before you trust them in traffic.
Brake technology is moving toward integrated software control and cleaner emissions under Euro 7, but the mechanical fundamentals haven't changed. As tech advances, safety advances — brake systems are integrating with software and creating safer, cleaner environments. For the cars on the road today, the upgrade that works is the one that matches the thermal load you're actually putting through the system. Run the wrong pad on the street and you'll have dust and noise; run the wrong pad at the track and you'll have no pedal halfway through the session.
Check the build date on your current rotors, verify the pad compound against the manufacturer's duty-cycle chart, and buy the fluid that meets the spec printed in the owner's manual. That's the upgrade.
Written by
Lee Shahin
Founder, European Wholesale Parts
Lee Shahin founded European Wholesale Parts in Pleasanton, California, after 18 years in the Mercedes-Benz and BMW parts trade. He came to the parts side from the shop floor: he opened a European repair shop in Northern California in the early 1990s, specialising in Mercedes-Benz and BMW, and grew it with his wife Laurie into a parts and delivery operation serving body shops and independent repair facilities across the region. Nearly two decades at the parts counter taught him where the expensive mistakes happen, and most of them are fluids: the wrong coolant in an aluminium block, an oil without the sheet approval the engine was designed for, a transmission topped with the wrong ATF. That is what he writes about here. Every article names the manufacturer specification by its exact designation, explains what the wrong fluid does mechanically, lists products that carry the approval, and gives the capacity and interval for the models and years the specification covers. When a reader needs a part sourced, the quote desk at European Wholesale Parts is where Lee and Laurie still answer the phone.